It is very important to set up the amplifier, speaker switch and speakers to achieve the best sound quality and audio volume while also protecting the amplifier and speakers from overload and possible permanent damage.
Summary of Steps for Wiring Setup
Step 1 - Obtain the amplifier maximum power output value (in Watts RMS).
Step 2 - Obtain the amplifier impedance value (in Ohms).
Step 3 - Check that all speakers to be used have the same power wattage (in Watts RMS).
Step 4 - Check that all speakers to be used have the same impedance value (in Ohms).
Step 5 - Choose the maximum number of speakers that you intend to be simultaneously active. For best performance, you should keep this number as low as possible. The higher the number, the more powerful the amplifier will need to be.
Step 6 - Use the obtained values with the calculator below to check appropriate system setup.
NOTE: Do NOT use speakers with different impedance or power wattage values. Use of speakers with different impedance or power values may cause permanent damage to the amplifier and/or speakers.
Step 1 - Setup Calculator
It is very important to check the power capacity requirements of the speakers and the power capacity available from the amplifier.
Select Values
Amplifier Watts RMS
Amplifier Impedance Ohms
Amplifier Volume Setting
Speakers Watts RMS (lowest)
Speakers Impedance (lowest)
Maximum Active Speakers
Speaker Switch Setup Check
Step 2 - Fine Tuning the Speaker Setup
Check each of the following steps to fine tune the speaker switch setup.
☑ - First, set the amplifier power wattage to be the speaker wattage multiplied by the maximum number of active speakers.
☑ - The setup calculator will not allow the use of an amplifier output power wattage that is two or more times greater than the speakers wattage
because setting the amplifier volume higher than the recommendation may result in irreversible speaker damage.
☑ - Once the calculator shows green colors for all of the parameters, increase the amplifier volume to find the highest acceptable value.
Once you find the highest value, you can use that setting as the most appropriate setting for the amplifier volume.
☑ - Alternatively, once the calculator shows green colors for all of the parameters, increase the maximum active speakers to find the highest acceptable value.
Once you find the highest value, you can use that setting as the most appropriate setting for the maximum active speakers.
☑ - NOTE: The speaker volume (loudness) is reduced by approximately half (50%) each time an additional speaker pair is activated by the speaker switch.
This means that it is best to use the lowest possible number of (maximum) active speakers.
In other words, set the maximum active speakers setting to no more than the maximum number that are desired to be simultaneously active.
Step 3 - Connecting the Speakers and Amplifier
Follow the steps below to connect pairs of speakers to the speaker switch and the amplifier.
☑ - Make sure that the speaker wires are present at the location where the speaker switch will be located.
☑ - Make sure that the amplifier wires are present in the place where the speaker switch is located.
☑ - Remove the speaker connectors from the rear of the speaker switch corresponding to the number of speaker pairs that you intend to connect.
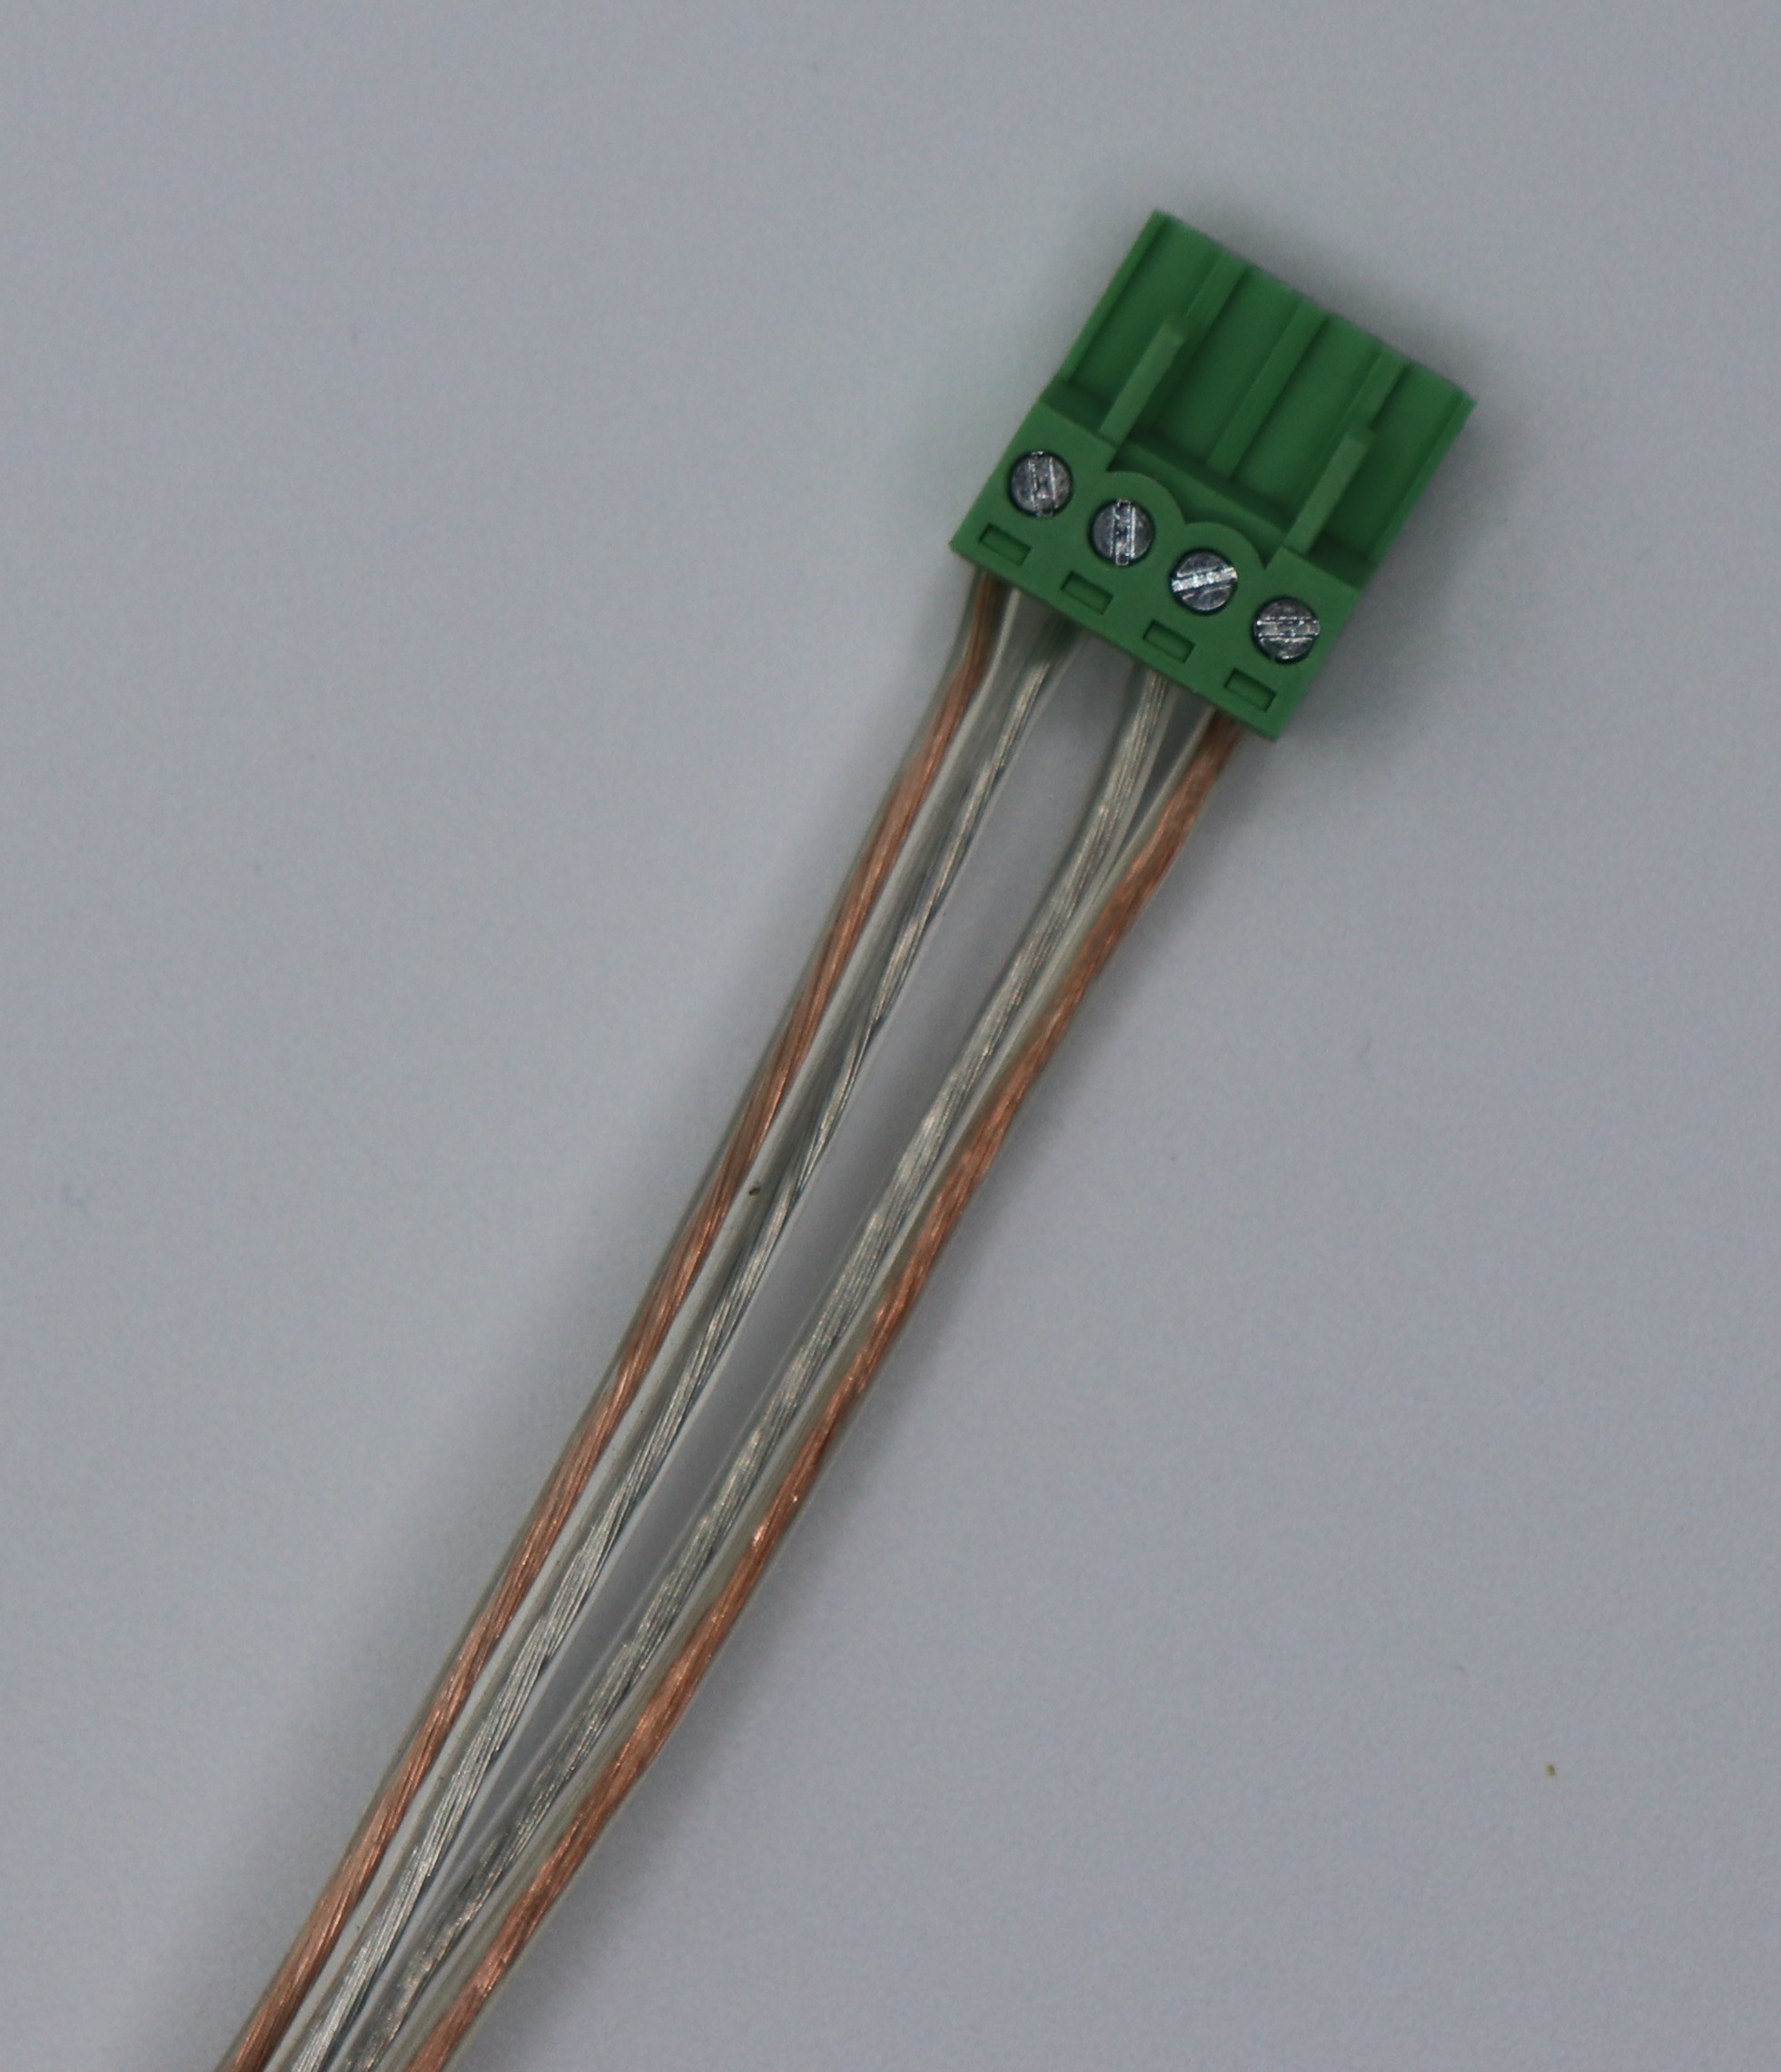
☑ - Take each pair of speaker wires and connect them (using the supplied screwdriver) so that the polarity of each wire matches and that each pair is connected to the left and right hand side of the connector.
☑ - IMPORTANT - ensure that ground (-) is connected to the outside connections of each connector. And, make sure that each left and right signal (+) is connected to the inside connections of each connector.
☑ - When all speaker pairs have been installed into the connectors, install each connector into the speaker switch in the desired order.
☑ - Take the two pairs of amplifier speaker wires and connect them (using the supplied screwdriver) so that the polarity of each wire matches and that each pair is connected to the left and right hand side of the connector.
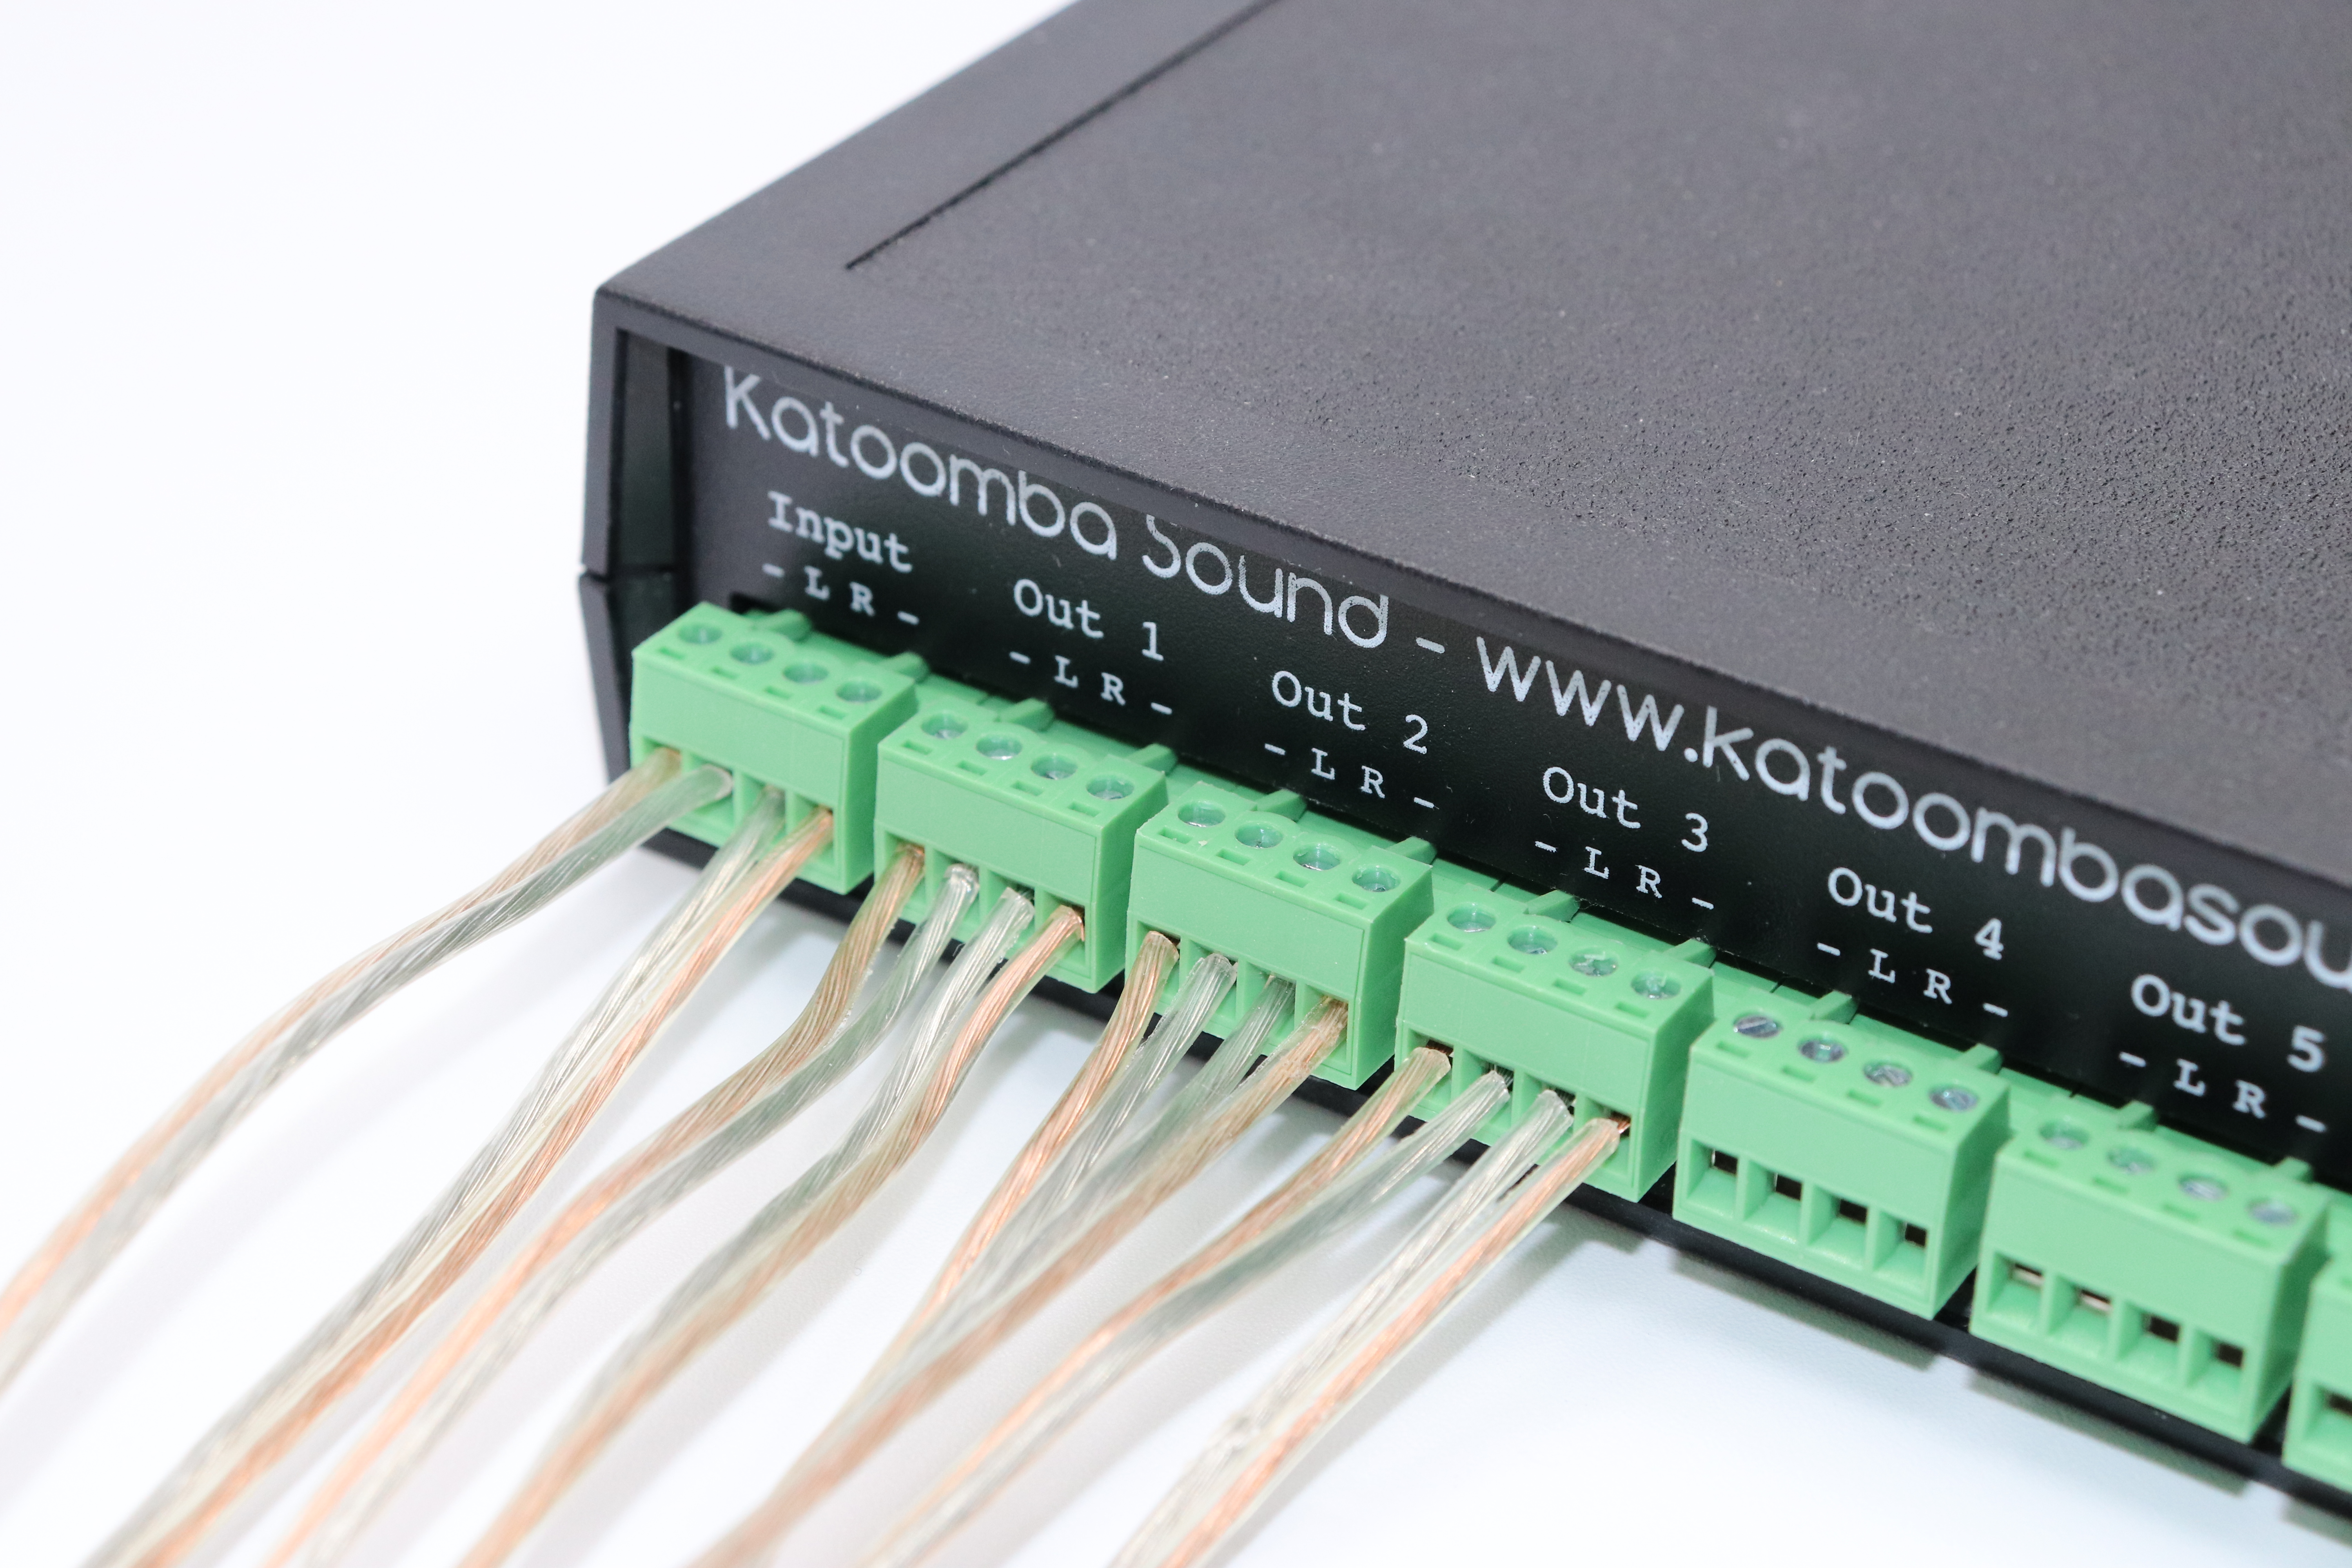
☑ - Install the amplifier connector to the speaker switch in the "Input" connector location.
In the picture shown above, the amplifier connector is plugged into the far left "Input" socket on the speaker switch.
Then, three pairs of speaker wires are inserted into connectors which are then connected to sockets labeled "Out 1", "Out 2", and "Out 3".
Note that the ground signals are labeled with a dash '-' and the signal (+) wires are labeled 'L' or 'R'.
Amplifier and speakers connections should match polarity at their end. That is, ground to ground and signals to signals.
Power and Network Setup
This completes the speaker and amplifier wiring of the speaker switch device. Now you can move on to: Network Setup of the speaker switch.